

Cloning is the shortcut that lets you swap a slow hard drive for an SSD and carry on exactly where you left off — same Windows, same programs, same desktop wallpaper, no reinstall, no re-entering licence keys. It works reliably. It also fails in three specific, predictable ways, and this guide is mostly about avoiding those.
This guide walks through how to clone hard drive to SSD on a Windows PC so it boots first time, and what to do when it does not. Budget an hour — most of it is waiting.
Clone or fresh install — decide before you start
Cloning copies everything, including the reasons your PC feels slow. If your Windows install is five years old, full of software you no longer use and has a startup list you have never looked at, a clean install onto the new SSD will feel dramatically better than a clone of the same mess.
Clone when: the install is healthy, you have software with licence keys you would struggle to reactivate, or you simply do not have a weekend.
Fresh install when: Windows is already misbehaving, you are moving from a very old Windows version, or the machine has accumulated years of junk. A clean install is also the honest answer if the drive you are replacing is failing — cloning a dying disk copies its bad sectors and its problems.
What you need
- The new SSD. Check the form factor your machine takes before ordering: a 2.5″ SATA drive and an M.2 NVMe stick are not interchangeable, and some laptops have only one of the two slots.
- A way to connect both drives at once. On a desktop, plug the new one into a spare port. On a laptop, you need a USB-to-SATA cable or an NVMe enclosure — around ten to twenty dollars, and worth owning afterwards as an external drive.
- Cloning software. The two mainstream consumer options are AOMEI Partition Assistant and EaseUS Partition Master. Samsung, Crucial and WD all bundle a free cloning tool that works only if the target is their own drive — if you bought one of those, try the free bundled tool first and only pay if it refuses.
- A backup of anything irreplaceable. Cloning writes to the target, not the source, so the risk is low — but “low” is not “zero”, and this is the one moment where a mistake costs you everything. If you do not have a backup, read our backup software guide first.
Before you clone: three checks that prevent 90% of failures
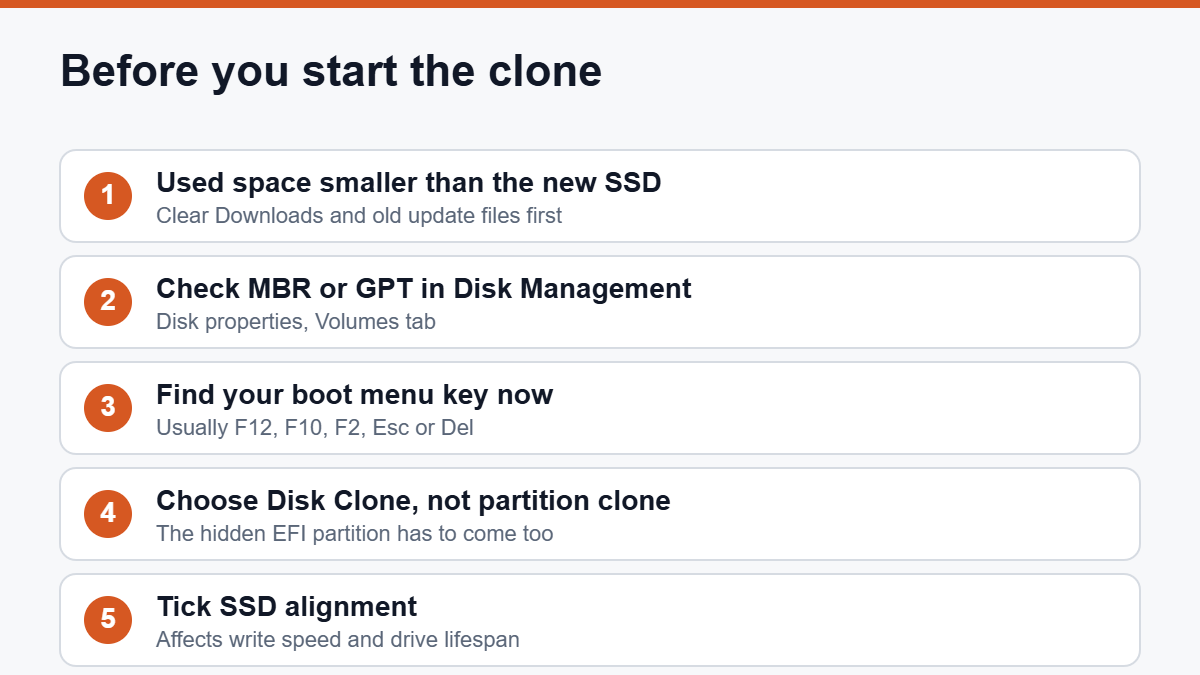
1. Is your data smaller than the new SSD?
The new drive does not need to be as large as the old one — it needs to be larger than the used space on the old one. A 1TB hard drive with 300GB used clones happily onto a 500GB SSD.
If your used space is bigger than the target, delete or move things out first. The usual big wins: the Downloads folder, old Windows update files (Disk Cleanup, then “Clean up system files”), hibernation file, and any game library — move that to an external drive and re-point the launcher afterwards.
2. MBR or GPT?
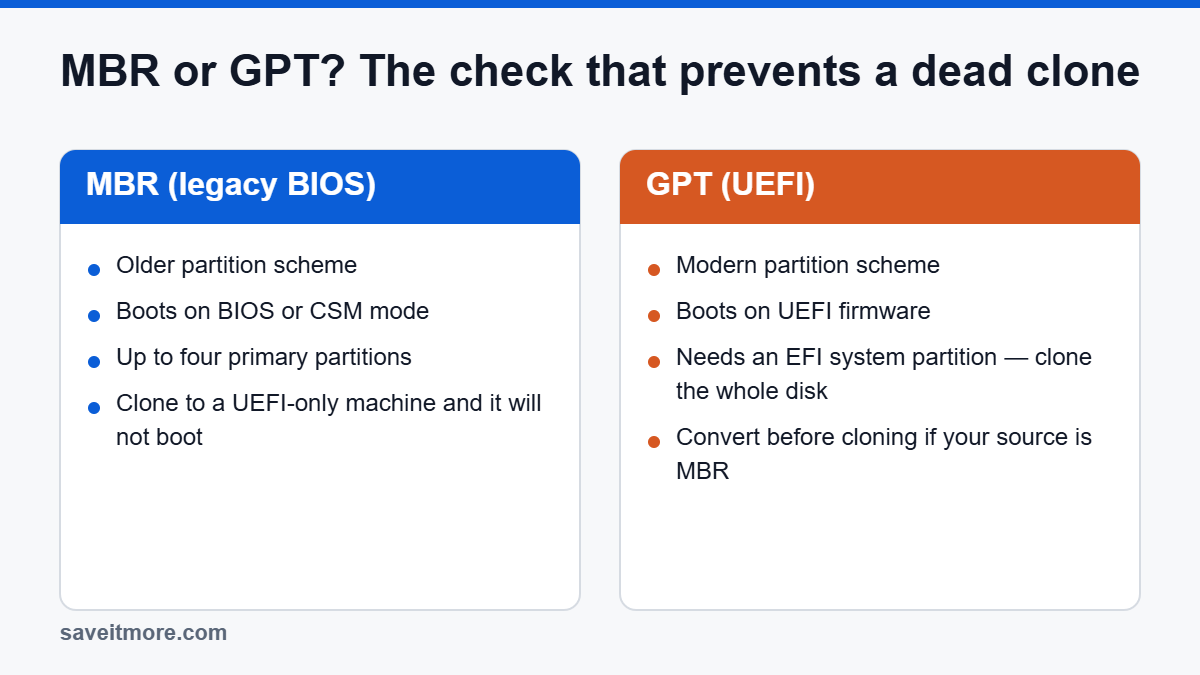
This is the single most common reason a clone will not boot. Press Win+R, type diskmgmt.msc, right-click the disk number on the left (not a partition), choose Properties, then the Volumes tab. It will say either Master Boot Record (MBR) or GUID Partition Table (GPT).
Microsoft’s own Windows support pages cover the conversion in detail. The rule: your machine’s firmware mode and the disk’s partition style have to agree. UEFI boots GPT; legacy BIOS/CSM boots MBR. If you clone an MBR disk and the machine is set to pure UEFI, you get a black screen. Good cloning software handles the conversion for you and will offer it as an option — accept it. If yours does not, Windows includes mbr2gpt for converting before you clone.
3. Do you know how to reach the boot menu on this machine?
Find out now, while the PC still boots. It is usually F12, F10, F2, Esc or Del at power-on, and the correct key is on the manufacturer’s support page. You will need it in step 6 and you do not want to be guessing then.
How to clone hard drive to SSD, step by step
- Connect the new SSD and confirm Windows sees it in Disk Management. A brand-new drive often shows as unallocated and may prompt you to initialise it — you can accept, but the clone will overwrite whatever you do here anyway.
- Install and open your cloning tool and choose Disk Clone, not partition clone. You want the whole disk including the hidden EFI system partition and recovery partition — copying only C: is the second most common reason a clone will not boot.
- Pick source and target carefully. Read the disk numbers and capacities twice. The target is erased. There is no undo.
- Tick “SSD alignment” (sometimes “optimise for SSD” or “4K alignment”). This aligns partitions to the SSD’s page boundaries and materially affects write performance and drive lifespan. There is no reason not to.
- Set the partition sizes. If you are cloning a large HDD to a smaller SSD, the tool will offer to shrink partitions to fit — check the resulting C: size looks sensible rather than leaving unallocated space stranded at the end. Then start the clone and leave it alone. An SSD-to-SSD clone might take twenty minutes; an old hard drive as the source can take several hours because the source is the bottleneck.
- Shut down and swap. Power off fully. On a desktop you can leave both drives in, but for the first boot it is cleaner to disconnect the old one — with two identical Windows installs visible, the firmware sometimes picks the wrong one and you will not notice for a week. On a laptop, physically swap the drives.
- Boot from the new drive. Use the boot menu key you looked up. If the machine goes straight into Windows, you are done.
When the clone does not boot
Black screen, or “no bootable device”. Almost always the MBR/GPT mismatch from check 2, or a missing EFI partition because a partition clone was used instead of a disk clone. Go into the firmware setup and look for a UEFI/Legacy or CSM setting — flipping it is a thirty-second test that either fixes it or rules it out. If neither, re-clone as a full disk clone with the conversion option enabled.
Windows starts repairing itself, then fails. Boot from a Windows installation USB, choose Repair → Troubleshoot → Command Prompt and run bootrec /rebuildbcd. This rebuilds the boot configuration against the new drive.
It boots but the drive shows the old, smaller capacity. The clone copied the old partition sizes and left the remainder unallocated. Open Disk Management, right-click C:, choose Extend Volume. If Extend Volume is greyed out because a recovery partition sits between C: and the free space, a partition tool will move it for you — this is exactly what AOMEI Partition Assistant and EaseUS Partition Master are for.
It boots but feels no faster. Check the drive is actually running on the interface you think. An NVMe drive in a SATA-only M.2 slot runs at SATA speed. Also confirm your SATA mode is AHCI rather than IDE in the firmware.
BitLocker, Secure Boot and the settings that block a clone
Three Windows features can turn a clean clone into a machine that will not start, and all three are easier to deal with before you begin than after.
BitLocker
If the source drive is encrypted with BitLocker, the cloning tool sees encrypted blocks rather than a filesystem. Some tools clone it sector by sector and the result boots; many produce a drive that asks for a recovery key the moment it starts, or simply fails to mount.
Do this first: open Manage BitLocker, suspend protection (or fully decrypt the drive if you have time), then clone, then re-enable BitLocker on the new SSD afterwards. Before you touch any of it, save your BitLocker recovery key somewhere that is not on the machine you are about to rebuild — printed, or in your Microsoft account. People lose access to their own data at this exact step more often than at any other point in the process.
Check whether it is on at all with manage-bde -status in an administrator command prompt. On many business laptops, and on some consumer machines signed in with a Microsoft account, device encryption is enabled by default without anybody switching it on.
Secure Boot and firmware mode
Secure Boot itself rarely blocks a clone, but it interacts with the MBR/GPT question above. If you convert a disk from MBR to GPT during the clone, you also have to switch the firmware from Legacy/CSM to UEFI, or the machine will not find a bootloader it recognises. Change one, change the other.
Fast Startup and hibernation
Windows Fast Startup leaves the filesystem in a partially hibernated state, which some cloning tools refuse to copy and others copy badly. Turn it off in Control Panel → Power Options → Choose what the power buttons do → Change settings that are currently unavailable, then untick Turn on fast startup. Do a full shutdown afterwards, not a restart. Turning off hibernation entirely with powercfg /h off also deletes hiberfil.sys, which frees several gigabytes — useful if your used space is close to the new SSD’s capacity.
Cloning a laptop with only one drive bay
Most laptops have room for exactly one drive, which means you cannot have the old and new disks inside the machine at the same time. There are three ways around it, in order of preference.
- USB enclosure or adapter. Put the new SSD in an external enclosure, clone to it while Windows runs from the old drive, then shut down and swap the two. This is the normal method and the enclosure costs less than a takeaway. Make sure the enclosure matches the drive — an NVMe stick will not work in a SATA enclosure, and vice versa.
- Image to an external drive, then restore. Create a full disk image onto an external hard drive, swap in the new SSD, boot the backup tool’s rescue USB, and restore the image onto it. Slower and needs the rescue media to work, but it is the only route if you have no enclosure — and you end up with a backup image as a side effect, which is not a bad outcome.
- Clean install and restore your files. Not a clone at all, but worth naming: if the old install was slow and cluttered, this is often the better use of the same afternoon.
One caution on USB enclosures: some cheap ones use bridge chips that do not report the drive’s true geometry, which can produce a clone that will not boot once the drive is installed internally. If the clone completes but the machine will not start from it, and MBR/GPT checks out, a different enclosure is worth trying before you conclude the SSD is faulty.
NVMe or SATA — check before you buy
The M.2 slot on your motherboard or laptop is not a guarantee that an NVMe drive will work in it. Some M.2 slots are SATA-only, some are NVMe-only, and some take either. Look up your exact model rather than assuming, because an NVMe drive in a SATA-only slot either will not be detected at all or will run at a quarter of its rated speed.
For most people the practical difference matters less than the marketing suggests. Moving from a mechanical hard drive to any SSD is a transformation; moving from a SATA SSD to an NVMe one is barely noticeable outside of large file copies and benchmarks. If the choice is between a larger SATA drive and a smaller NVMe one at the same price, take the capacity.
What to do with the old drive
Leave it untouched for a fortnight while you make sure nothing is missing. After that, you have a free, working drive and three sensible uses for it:
- Make it your backup drive. Put it in the enclosure you bought for the clone, wipe it, and point a scheduled image backup at it. This is the best outcome — you finish the upgrade with a backup you did not have before.
- Keep it as a cold recovery copy. Do not wipe it at all. Label it with the date and put it in a drawer. It is a complete, bootable snapshot of your machine as it was.
- Retire it properly. If you are selling or recycling it, a quick format is not enough — the data is recoverable. Use the drive manufacturer’s secure erase tool, or full-disk encryption followed by a format, and physically destroy a drive that has failed rather than binning it intact.
Whichever you choose, do not leave a second bootable copy of Windows connected to the machine permanently. It confuses the boot menu, and a Windows update occasionally decides to patch the wrong one.
After the swap: five minutes of housekeeping
- Confirm TRIM is on. Open an admin command prompt and run
fsutil behavior query DisableDeleteNotify. A result of 0 means TRIM is enabled, which is what you want. - Turn off defragmentation for the SSD. Modern Windows already does the right thing (it runs a TRIM pass rather than a defrag), but if you ever installed a third-party defragmenter, exclude the SSD from it.
- Check Windows still shows as activated. Settings → System → Activation. A drive swap alone almost never deactivates a digital licence tied to the motherboard, but check rather than discover it later. If activation did break and you need a replacement key, read the cheapest legitimate way to buy a Windows licence before paying retail.
- Do not wipe the old drive yet. Live on the new one for a fortnight first. The old disk is a free, complete, point-in-time backup until you are certain nothing is missing.
- Then set up a real backup. The clone was a one-off copy, not a backup plan. This is the moment to schedule something.
Frequently asked
Do I need to buy software, or is the free version enough?
Free tiers of AOMEI and EaseUS can clone data disks. Cloning the system disk — the one Windows boots from — is generally a paid feature in both, as is MBR-to-GPT conversion during the clone. If your SSD came from Samsung, Crucial, WD, Seagate or Kingston, check for the manufacturer’s own free cloning tool first; it is restricted to their drives but costs nothing.
How long does it take to clone hard drive to SSD?
An SSD-to-SSD clone of a normal Windows install is usually twenty to forty minutes. Cloning from an old mechanical hard drive can take several hours, because the source drive is the bottleneck rather than the software. Start it when you do not need the machine.
Can I clone from a smaller drive to a larger one?
Yes, and it is the easy direction. Just remember to extend the partition afterwards so you get the extra space.
Will my programs and licences survive?
A disk clone is bit-for-bit, so yes in almost every case. The exceptions are a handful of applications that bind their activation to a hardware fingerprint including the drive serial — some professional audio and CAD software does this. If you own something like that, deactivate it before the swap and reactivate afterwards.
Can I clone a failing drive?
You can try, but a normal cloning tool aborts on read errors. If the drive is clicking or the copy keeps stalling, stop — that is a data recovery job, not a cloning job. Tools like EaseUS Data Recovery Wizard, Wondershare Recoverit and Drecov exist for pulling files off a drive you cannot image, and a physically failing disk belongs with a recovery lab.
What do I do with the old hard drive?
Once you are confident in the new one, put it in the USB enclosure you bought for the clone and it becomes your backup drive. Wipe it first (Disk Management → delete volumes → new volume) so you are not carrying a second bootable copy of your Windows around.
Where the software is discounted
The tools you need to clone hard drive to SSD sit in the same permanently-discounted category as backup software, so check the codes before you buy:
- AOMEI coupon codes — Partition Assistant, Backupper, MyRecover
- EaseUS coupon codes — Partition Master, Todo Backup, Data Recovery Wizard
- Abelssoft coupon codes — JetDrive and the Windows maintenance range
- Wondershare coupon codes — Recoverit and the wider suite
- How to recover deleted files on Windows — every route in order, and the SSD trap
Still deciding between imaging your machine and cloning it? The two solve different problems — our guide to Windows backup software explains which one you actually need.